Trek Update – In response to Stok Kangri’s rapid degradation, the Stok Village Committee and ALTOA (All Ladakh Tour Operators’ Association) have announced a three-year ban on trekking and climbing on Stok Kangri peak. Stok Kangri will remain closed from 2020 to 2022.
Click here for our alternative to Stok Kangri Trek in Ladakh
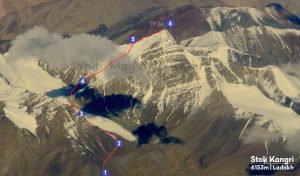
Stok Kangri Trek – Summit Day Illustration
Stok Kangri is getting immensely popular with experienced as well as novice trekkers.
Starting from Leh, it takes just nine days to reach the summit and back including two days of acclimatizing in Leh. Some trekkers do it in lesser days but nine days is highly recommended to deal with the high altitude thin air and lack of oxygen in Ladakh.
Stok Kangri trek is a good challenge for seasoned trekkers to test their limits up to 6000 meters and also a great introduction to high altitude trekking for lesser experienced trekkers.
The climb to Stok Kangri peak is entirely non-technical and hence can be attempted by seasoned as well as new trekkers. It demands endurance and stamina to walk for 12 hours and climb approx.ly 1200m/3900ft from the base camp, only on the summit day. Rest all days it is only 3-4 hours of a daily trek with a maximum altitude gain of 500 meters till you reach the Base Camp
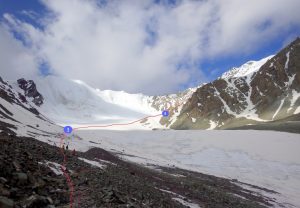
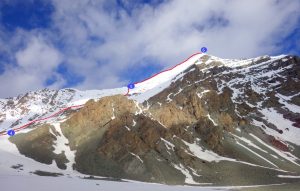
Here is a breakdown of the climb from Base Camp to the peak of Stok Kangri. This illustration will help you mentally prepare for the summit as you may look at each stage to complete one at a time during your summit attempt.
Stage 1: Base Camp to the Cliff – 5,150metres
Stage 2: Cliff to the Old High Camp (Glacier) – 5,375 meters
Stage 3: Old High Camp(Glacier) to the other side of the Glacier – 5,470 meters
Stage 4: Start of the Shoulder to end of the Shoulder – 6000 meters
Stage 5: Shoulder to Summit 6,153 meters
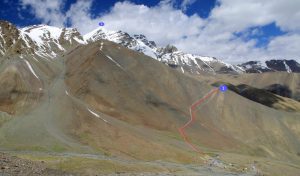
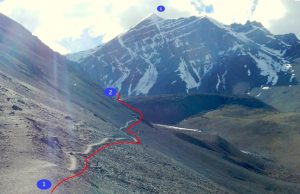
1. Stok Kangri Base Camp to the Cliff above Base Camp
Average Walking time: 30-45min
Elevation Gain – 150m
This trail is visible when you are at the base camp. Most climbers go up this slope when they arrive at the base camp for the acclimation hike. Once you climb this cliff, the Stok Peak is visible from here. There are a few prayer flags on this cliff, and you get a fantastic view of the base camp and Stok region from here on a bright sunny day.
On the summit day, you will start your hike at midnight or earlier depending on your speed. For slow movers, it is advisable to start by 10 pm. Have an early dinner around 6 pm and try to catch a few hours of rest or a nap before you start.
This stretch from base camp to the cliff acts an excellent warm-up and makes you alert for the climb ahead. Rest for a few minutes after you reach the cliff and have a sip of warm water before you begin your next stage of the hike.
2. Cliff to the Old High Camp
Average Walking time: 60-75min
Elevation Gain – 215m
This stage has a leisurely walk in the beginning and then gentle slopes as you reach the point where you have the helipad for rescue helicopters. This section may have some snow depending on the season or different weather conditions. In July till August, this stretch is usually without snow and comprises of loose gravel till you reach the High Camp. After the helipad, you will pass the advanced base camp (not to be confused with high camp) where you can rest for a while. Soon you will start climbing a small patch with medium-sized rocks to reach the high camp. In this stage, you are traversing a steep gradient slope towards the high camp. After crossing the steeper rocky patch, you are in the midst of a vast glacial valley. This point is known as a High camp where some people could camp until a few years ago but is now banned.
This ban is due to the environmental concerns of local people, and now no organizer gets permission to camp here.
Use this section to get into a nice rhythm and get ready for the most challenging part of the Stok which lies ahead from here.
3. Old High Camp to the other side of the Glacier
Average Walking time: 25-40mins
Elevation Gain – 95meters
In this stage, you walk from the high camp to the other side of the Glacier. Though there are patches of glacial ice that can be managed without putting on your crampons, it is advisable to wear your crampons from the high camp.
4. Start of the Shoulder to the end of the Shoulder
Average Walking time: 3-4 hours
Elevation Gain – 530m
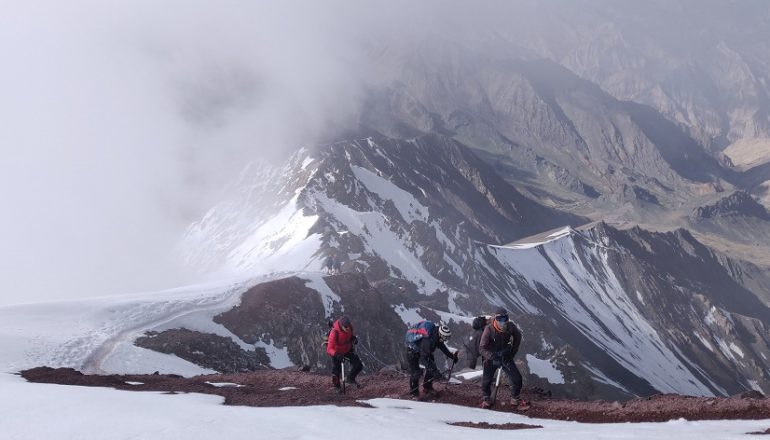
The big and most challenging climb to Stok Kangri starts from this point. As you reach the other end of the Glacier, you may encounter a couple of glacial streams – which you can jump over to cross. After that is a little rocky patch and what follows from here is the beginning of the toughest part of your climb. At every step, from here you will be short of breath and your stamina is tested to its maximum limits.
Many climbers are known to give up the summit climb in between this stage. This climb is a steep ascent throughout till you reach the end of Shoulder and it is possible to get out of breath in this stage. Pace yourself right and walk slowly and steadily focussing just on the next step. Do not rush, slow yourself down, and don’t look too far ahead towards the end of the Shoulder. Use your hiking pole to balance yourself and halt after a few steps.
As you climb higher, you will be able able to witness the sunrise from the ridge. As day breaks, you will feel warm and positive. Soon you will be at the end of the Shoulder. Rest here for a few minutes, have a snack and some juice before starting the final stage to the summit.
5. Shoulder to Stok Kangri Peak Summit
Average Walking time: 1.5 – 2.5 hours
Elevation Gain – 150m
Majority of the trekkers who have made it to the Shoulder eventually go on to the final summit of Stok Kangri. The final stage is a walk on a ridge with exposure on both sides. It is now mandatory to be roped-n while climbing this stage for your safety.
Depending on weather conditions there might be dry patches or the ridge may be covered with snow. The climb towards the peak in unrelenting and as you gain altitude, you will feel the effect of deprived oxygen on your body. But this will be compensated with great views all around you.
After about an hour of climbing, you will start seeing the prayer flags on the Stok peak. You may have some snow and ice as you make a final dash towards the summit. The last few steps are a test on your mental and physical strength.
But the joy of the summit will make you forget all the pain. The view from the Stok Kangri peak is mesmerizing. From the summit, you get a 360′ view of the entire Karakoram range and beyond. If the visibility is clear, you can see the Kardhung La to your north, the mountains of Zanskar to the west and vast stretch of Leh Ladakh valley on the south. The 3 KM long Glacier which made people quit is visible and looks stunning from the top.
6. Stok Kangri Summit and Return to Base Camp
After clicking some pictures, you can start your return journey back to base camp as reaching the summit of Stok Kangri is only half the job done. It takes almost 8-9 hours to reach Stok Kangri peak but to reach Stok kangri base camp, It would take not more than 4-5 hours.
Be extremely careful in your journey down to Base as most accidents happen on the way down. Remain focused on your downward journey and descend safely.
This post gives you a general idea about the summit day and is not the ultimate guide. The route changes each year depending upon daily weather conditions, and the amount of snow/ice you get on the slopes is unpredictable. As a thumb rule, it is advisable to use crampons after the Glacier but is not compulsory.
During your acclimatization day in the base camp, it is advised to fix the size of the crampons matching your shoe size and go for practice walks. Keep the crampons safely with you and don’t mix them with other trekkers. It is difficult and tedious to adjust the crampons during the summit.
Please have an expert guide along with you during the summit, who knows the summit trail very well and can rope you up. Find out how many times the guide has been to Stok Kangri summit and avoid guides who are novices for the Stok Kangri summit.
We hope you have a successful summit.
For the Complete Stok Kangri Trek Preparation guide Click here
To Book the Stok Kangri Trek Click here
Our sincere thanks to WhiteMagic adventure for excellent pictures of Stok Kangri summit illustration.
 WhatsApp Us